

Trade order block scalps only when an unmitigated block lines up with displacement and at least one confluence signal, and only inside a high-liquidity session. Cap risk at a fixed small percentage per trade, anchor stops to structure, and skip anything that doesn't clear the checklist. Three mechanical models below give you the entries, stops, and confirmation rules to backtest before you ever risk live capital.
TL;DR:
- Only trade unmitigated order blocks that show displacement and confluence signals within high-liquidity sessions like London and New York.
- Use five-minute charts for clearer entries on volatile instruments, while one-minute charts require very low latency and tight spreads for effective scalping.
- Confirm each setup with displacement, fair value gaps, and session context, avoiding trades during chop or after multiple taps without fresh displacement.
- Limit risk to 0.5% to 1% per trade, based on structure stops and ATR, and enforce a daily loss cap to prevent overtrading.
- Employ automated tools like order block indicators and regime filters to speed detection and improve discipline in entering only high-confidence setups.
Table of Contents
- What Is Order Block Scalping and Why Does It Work?
- Which Timeframes and Sessions Work Best for Order-Block Scalps?
- Three Mechanical Order-Block Scalping Models
- How Do You Execute Entries on M1 and M5?
- How Do You Validate an Order Block Before Trading It?
- What Risk Rules Keep Order-Block Scalpers Alive?
- How Scalping-Algo's Tools Support These Order-Block Scalps
- Regime Awareness Beats Frequency
- Put These Order-Block Scalps to Work
- Sources
- FAQ
What Is Order Block Scalping and Why Does It Work?
An order block is the last candle before a sharp, one-directional move. Price consolidates, then an impulsive push happens, and that final opposing candle marks where large limit orders likely sat before the move fired off. That's the standard identification method traders use to draw an OB on the chart.
The edge comes from freshness. An unmitigated block, meaning price hasn't returned to tap it yet, still holds unfilled institutional interest. A block that's been touched two or three times has probably already been absorbed, and the orders behind it are gone.
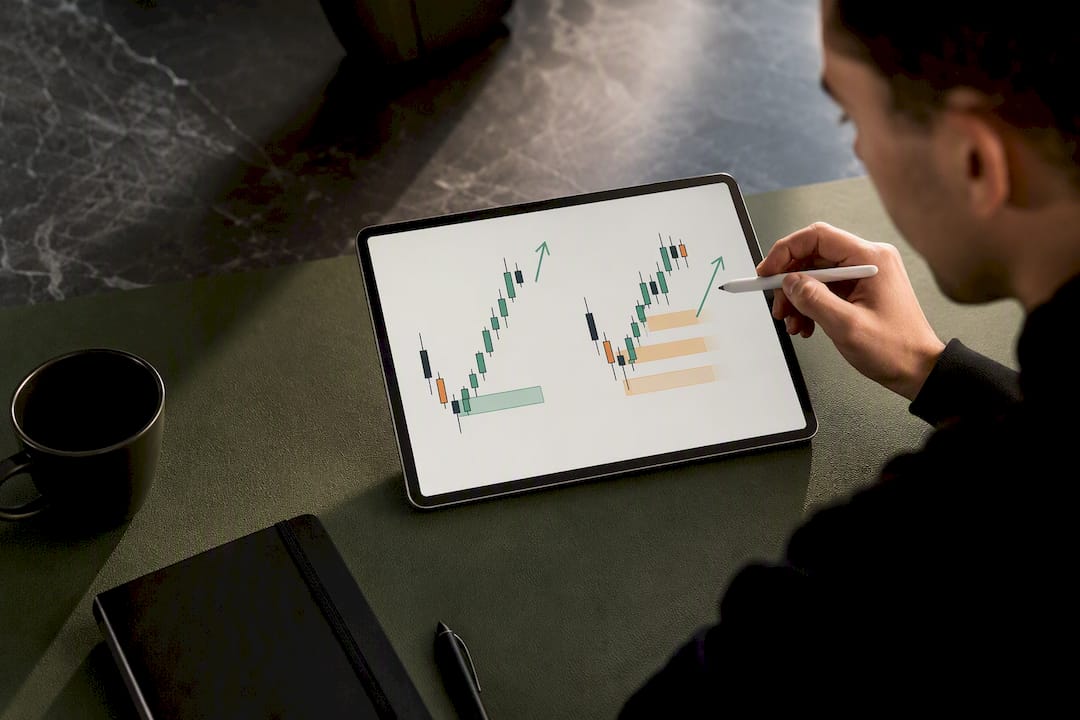
Displacement is what confirms the block matters. A slow grind away from an OB tells you little. A sharp, wide-range candle or two, often leaving a fair value gap (FVG) behind, signals real conviction.
What kills an order block scalp before it starts:
- Multiple prior taps on the same zone with no fresh displacement
- No FVG or imbalance left behind by the move
- The move happens against higher-timeframe structure
Which Timeframes and Sessions Work Best for Order-Block Scalps?
The one-minute chart gives you surgical entries but adds noise. Every wick looks like a signal, and spread eats a bigger share of a smaller target. The five-minute chart filters out some of that static and tends to hold up better for gold and other volatile instruments, where a 5-minute XAUUSD order block strategy has shown consistent structure during high-volume hours.
Session timing matters more than most scalpers admit.
- London and New York overlap delivers the deepest liquidity and cleanest displacement
- Asian session range tends to produce weak, low-conviction OBs
- Futures and majors behave better than exotic pairs on M1 due to tighter spreads
Latency above 100 milliseconds can degrade a one-minute scalp before you even see the confirmation candle close, according to execution research on short-timeframe trading. If your broker's fills are slow, move to M5 or skip the setup.
Three Mechanical Order-Block Scalping Models
Three high-probability entry models give you a repeatable framework, each with its own trigger and stop logic.
- OB plus FVG overlap. Look for an order block that shares space with a fair value gap. Place a limit order at the overlap zone rather than chasing price, and set your stop just beyond the block's far edge.
- Breaker-block flip. When an OB fails and price closes through it, that former block often flips into support or resistance. Wait for a retest confirmation candle before entering, never the first touch.
- Post-sweep OB with displacement. Price sweeps a liquidity pool, reverses hard, and leaves a fresh OB behind. Enter around the midpoint, or optimal trade entry (OTE), of the displacement leg rather than the block's full range.
These liquidity sweep setups tend to produce fewer trades but higher conviction results because they stack three confirmations at once: swept liquidity, a structural flip, and an FVG.
Pro Tip: Don't force all three models into every session. Pick the one that matches current volatility, and let the other two sit idle until conditions favor them.
How Do You Execute Entries on M1 and M5?
A trigger hierarchy keeps you from jumping the gun. First, a limit order sits at the OB/FVG overlap zone. Second, wait for a lower-timeframe change of character (CHoCH) inside that zone. Third, confirm with a candle close before adding size.
Order type depends on how the setup formed:
- Use a limit order at the block for the OB+FVG model, since you're buying the discount, not chasing it
- Use OCO orders around breaker retests, since you don't know which side confirms first
- Reserve aggressive market entries for post-sweep displacement, where waiting costs you the best price
Stops belong at structure, not at an arbitrary pip count. Place the stop beyond the block's wick, then sanity check the distance against average true range (ATR). If the ATR-based distance is wider than your account's risk tolerance for that pair, reduce position size rather than moving the stop closer.
Spread alone can consume 20 to 30 percent of a typical M1 target on tighter instruments, per multi-timeframe execution guidance. Check your broker's average spread before committing to one-minute execution on any pair.
How Do You Validate an Order Block Before Trading It?
A block with no confirmation behind it is a guess with a fancy name. Run this checklist before every entry:
- The OB is unmitigated, meaning price hasn't returned to it since it formed
- Displacement left a visible FVG or clear imbalance
- The zone overlaps a session liquidity pocket, not a dead range
- Order flow or footprint data, when available, shows aggressive volume at the level
Volume profile and footprint charts give you the clearest read on whether real size traded through a level, since institutional footprint analysis helps separate genuine absorption from a random wick. Without that data, fall back on session context: does the block sit inside a known liquidity pocket, or is it floating in the middle of a quiet range?
Skip the trade entirely during chop, after a block has already been tapped twice, or during a thin-volume session. An order block that fails a three-rule validation check for structure alignment and displacement isn't worth the risk, no matter how clean it looks on the chart.
Pro Tip: If you can't tell whether a block is fresh at a glance, mark every tested OB with an "X" the moment price closes through it. Clutter forces discipline.
What Risk Rules Keep Order-Block Scalpers Alive?
Cap risk at a small, fixed percentage per trade, somewhere in the 0.5% to 1% range depending on account size, and set a hard daily loss limit that shuts the platform down for the session once hit. Position size gets calculated backward from your structure stop, not forward from a lot of size you like.
- Risk percent stays fixed regardless of how confident the setup looks
- Position size equals account risk divided by stop distance in pips, adjusted for ATR
- A session-level stop, say three losing trades in a row, ends trading for the day
A structured paper-trading ramp over several weeks, tracking win rate, average risk to reward, and execution slippage, exposes leaks before they cost real money.
| Risk element | Rule of thumb |
|---|---|
| Per-trade risk | 0.5% to 1% of account |
| Daily stop | 2 to 3 losing trades |
| Minimum sample before scaling up | Several dozen backtested and paper trades |
| Typical reward-to-risk target | 1.5:1 to 2.5:1 on validated setups |
How Scalping-Algo's Tools Support These Order-Block Scalps
Running three mechanical models by eye on a one-minute chart is tiring. Scalping-Algo's order block indicator marks unmitigated zones and FVG overlaps automatically, and Edge Finder flags the regime shifts that tell you when a session favors sweeps over ranges.
- Non-repainting, close-based signals confirm entries the way this playbook demands, no early exits, no repainted arrows
- Webhook alerts push confirmed setups straight to Discord, so M1 and M5 windows don't slip past you
- The Command Center's backtesting dashboard lets you run these three models against your own instruments before going live
Regime Awareness Beats Frequency
Order block scalps work best in trending, liquid sessions, not in every session you happen to be awake for. Skip chop, respect your daily stop without negotiating, and treat a stopped-out trade as data, not an insult. Patience on setup selection, not trade count, is what protects the edge over a full month.
— Tran
Put These Order-Block Scalps to Work
Reading charts by hand for unmitigated blocks, displacement, and FVG overlap works, but it's slow, and slow costs you the M1 window every time. Scalping-Algo builds that detection directly into TradingView, with non-repainting signals confirmed on candle close and sub-second Discord alerts so the setup reaches you before the retest finishes.

The Smart Scalping Signals suite maps directly to the three models covered here, and the open-source scripts mean you can verify exactly how each signal fires, no black box, no guessing. Pair it with Edge Finder for session and regime filtering, then run your own backtests through the Command Center dashboard before risking a dollar live. Start on the Monthly, Yearly, or Lifetime plan and join the Discord mentorship sessions to see these setups called in real time.
Sources
- 3 High-Probability Order Block Entry Models
- Scalping Strategies: Maximizing Profits in Short-Term Trades | For Traders
FAQ
Is Order Block Strategy Profitable?
Order block trading can be profitable when entries are limited to unmitigated blocks confirmed by displacement and at least one confluence signal, rather than every visible zone on the chart. Profitability depends far more on strict validation and risk control than on the concept itself.
What Is the Most Profitable Scalping Strategy?
No single scalping strategy wins in every regime, but liquidity sweep setups with displacement tend to produce fewer trades and higher conviction results than chasing every order block on sight. Matching the model to the session regime matters as much as the model itself.
What Is the Best Strategy for Trading Order Blocks?
The strongest approach combines an unmitigated OB with a fair value gap overlap and enters on a lower-timeframe confirmation candle, rather than the first touch. Pair that entry logic with a structure-based stop and a fixed small risk percentage per trade.
Which Timeframe Is Best for Order Block Trading?
Five-minute charts tend to offer cleaner order block scalps than one-minute charts because they filter out some noise while still allowing quick entries, particularly on volatile instruments like XAUUSD during London and New York sessions. One-minute charts work best for traders with low-latency execution and tight spreads.