

Confluence in trading is the alignment of multiple independent signals at the same price and time, creating a setup where several unrelated reasons all point to the same trade. One signal is an opinion. Three independent signals agreeing at the same level is an edge. The core idea is simple: the more independent factors that agree, the higher the probability the level holds and the trade works out.
True confluence draws from different analytical domains, not just more indicators. Think of it like a courtroom: one witness can be wrong, but five independent witnesses telling the same story leave very little room for doubt. The same logic applies to your chart.
Core elements of genuine confluence:
- Independent signals: Each factor measures something different, not the same thing five ways
- Alignment at the same level: All signals point to the same price zone at the same time
- Multiple domains: Structure, momentum, volume, and timeframe all contribute separately
- Pre-trade confirmation: Confluence is built before entry, not assembled after the fact
- Increased confidence: More independent agreement means higher-probability execution
What is confluence in trading and how does it work?
Confluence trading works by waiting for several independent factors to stack at the same price zone before committing to a trade. You do not act on the first signal you see. You wait until the chart gives you multiple reasons, from different analytical families, all pointing the same direction.
Common components that form a confluence setup:
- Higher-timeframe trend: The daily or 4-hour direction sets the bias for your entry timeframe
- Support and resistance levels: Horizontal zones tested multiple times carry more weight
- Fibonacci retracements: The 50%–61.8% zone of a prior swing is the most reliable area
- Volume confirmation: A volume spike at a key level signals institutional participation
- Candlestick patterns: A pin bar or engulfing candle at a confluence zone adds a trigger signal
- Moving averages: The 50, 100, or 200 EMA acting as dynamic support or resistance
- Multi-timeframe agreement: The same level visible on the daily, 4-hour, and 1-hour simultaneously
A confluence zone is a price area where several of these factors overlap within a tight band. Because multiple reasons for a reaction cluster in one place, these zones tend to produce stronger and more reliable price reactions than any single level alone. Signal independence is the whole point: RSI and Stochastic are both momentum indicators derived from price, so stacking them does not give you two independent signals. A higher-timeframe level and a volume spike at that level are genuinely independent, and their agreement carries real weight.
Why confluence gives you a real trading edge

Confluence filters low-probability setups and acts as a confirmation mechanism that directly improves trade accuracy. Fewer trades, better trades. That is the trade-off, and it is a good one.
Key benefits of applying confluence:
- Reduces false signals: A single indicator fires constantly; stacked independent signals fire rarely but more accurately
- Improves entry timing: Confluence zones give you a defined price area to watch, not a vague guess
- Builds trade confidence: Knowing three or four factors agree makes it easier to hold a position through normal noise
- Focuses on quality: You stop chasing every setup and start waiting for the ones that actually stack up
- Supports risk management: A pre-trade scoring system lets you size positions based on setup strength
Pro Tip: Discipline means saying no to the two-factor setup just as much as it means saying yes to the four-factor one. If the confluence is not there, the trade is not there.
Common mistakes that kill confluence trading
The biggest misconception is that adding more indicators automatically creates better confluence. It does not. Overloading charts with multiple momentum indicators like RSI, Stochastic, and MACD all on the same timeframe gives you the illusion of confluence while really just measuring momentum three times. That is not edge. That is noise dressed up as confirmation.
The critical mistake: Most traders assemble confluence after they have already decided to take a trade, then look for signals that justify the entry. That is hindsight bias, not analysis. Confluence built backward is not confluence at all. It is a rationalization that will cost you money consistently.
Common mistakes to avoid:
- Using correlated signals: RSI + Stochastic + MACD on the same timeframe is one signal, not three
- Post-hoc justification: Building confluence after the fact instead of before the trade is the most common discipline failure
- Ignoring counter-signals: A bearish fundamental catalyst against a bullish technical setup is a warning, not something to dismiss
- Chasing exhausted levels: A level that has been tested four or five times may already be depleted of institutional liquidity
- Treating quantity as quality: Five signals from the same family are worth less than three from different families
Expert insights on building real confluence setups
Signal independence across different domains is what separates genuine confluence from the illusion of it. True confluence combines market structure, price location, order flow, momentum, and timeframe agreement. Each domain contributes something the others cannot.
The widely accepted guideline is three independent factors before risking capital. One factor is a guess. Two is a maybe. Three from genuinely different families is a solid, high-probability setup. Going beyond four or five can actually work against you: a level that every system on every timeframe flags has likely already attracted institutional attention, meaning liquidity may be exhausted by the time you arrive.
Expert recommendations for effective confluence:
- Prioritize independence: Signals from structure, location, volume, and momentum are genuinely independent; multiple oscillators are not
- Use a pre-trade checklist: Treat confluence as a scoring system completed before entry, never after
- Check for counter-confluence: Actively look for signals that contradict your setup; if they exist, reduce size or skip the trade
- Watch for stale levels: A confluence zone that has been touched repeatedly may no longer hold the same weight
- Verify fundamental alignment: A strong technical setup against a major news catalyst is a trap, not an opportunity
Pro Tip: Three independent confluences is the sweet spot. Fewer and you are trading hope. Too many and you may be entering a level the market has already priced in.
How to identify and combine multiple confluence factors
Start with the higher timeframe to establish direction, then drop down to find your entry. The daily chart sets the bias. The 4-hour chart identifies the zone. The 15-minute or 5-minute chart provides the trigger. This top-down approach keeps every layer of your analysis aligned.

Build your confluence from different families. A practical stack might look like this: a daily uptrend (trend family), price pulling back to a prior support level (structure family), that level coinciding with the 61.8% Fibonacci retracement of the last swing (location family), and a bullish engulfing candle forming there on rising volume (price action plus volume). Four independent reasons. Four different families. That is a high-probability setup worth taking seriously.
You can also use scalping confluence methods to apply this same framework on lower timeframes, where speed matters and every signal needs to earn its place. The logic is identical; the timeframes just compress.
How to prioritize and weigh different confluence signals
Not all confluence factors carry equal weight. Higher-timeframe signals outrank lower-timeframe ones because they represent more capital and more decision-makers. A weekly support level matters more than a 15-minute moving average crossover. Structure and location signals tend to be the most reliable anchors; momentum and candlestick patterns serve better as triggers than as primary reasons to enter.
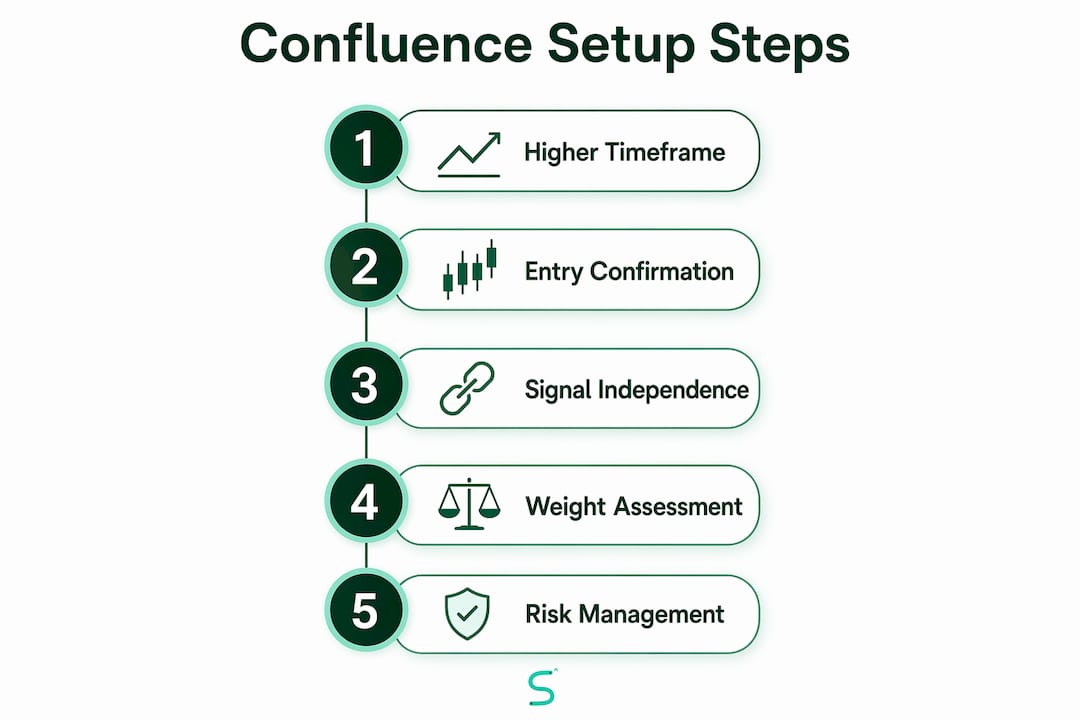
Assign weight based on three criteria: timeframe (higher is stronger), independence (genuinely different domain is stronger), and historical reliability (a level tested and respected multiple times is stronger than one tested once). When you score a setup, the highest-weight factors should be present first. A trigger signal like a pin bar only earns its place when the structural and locational factors are already confirmed.
For a practical read on how signals stack in real execution, the guide on reading trading signals covers how to evaluate each layer before committing to a trade.
Risk management when trading with confluence
Confluence does not eliminate risk. It filters it. Even a four-factor setup fails sometimes, and your position sizing needs to account for that reality. The practical rule: size your position based on setup quality, not just account percentage. A three-factor setup might warrant half the size of a four-factor setup with volume confirmation.
Place your stop loss beyond the confluence zone, not inside it. If price returns to the zone and breaks through, the confluence has failed and the trade is wrong. Keeping the stop outside the zone gives the setup room to work while defining exactly where you are wrong. Take profit targets should sit at the next significant structural level, not at an arbitrary multiple of your risk.
For traders using automated tools, a trade copier setup can help enforce consistent position sizing rules across accounts, removing the emotional sizing decisions that often undermine otherwise solid confluence-based entries.
What a confluence trade looks like in practice
Consider EUR/USD pulling back on a 4-hour uptrend. Price drops into a zone where a prior support level, the 61.8% Fibonacci retracement of the last bullish leg, and the 200 EMA on the 4-hour chart all sit within a 15-pip band. On the 15-minute chart, a bullish engulfing candle forms at the bottom of that zone on above-average volume. That is four independent factors: structure, Fibonacci location, dynamic support, and a volume-confirmed price action trigger.
The stop goes below the zone, roughly 20 pips below the engulfing candle's low. The target sits at the prior swing high, giving a clean risk-to-reward ratio. The trade either works because the confluence held, or it fails cleanly and you exit with a defined loss. No guessing. No hoping. Just a structured decision backed by independent evidence.
Limitations you need to know about confluence trading
Confluence improves probability. It does not guarantee outcomes. Markets can and do blow through even the strongest confluence zones, particularly during major news events, liquidity sweeps, or when institutional order flow shifts direction without warning.
The other real limitation is subjectivity. Two traders looking at the same chart can identify different confluence factors and reach different conclusions. This is why a written checklist matters: it forces consistency and removes the temptation to count the same signal twice. Confluence also takes time to develop. Waiting for three or four factors to align means fewer trades, which can be psychologically difficult for traders conditioned to constant activity. The discipline to wait is part of the method, not a side effect of it.
Scalping-algo's premium TradingView indicators are built specifically to surface confluence signals in real time, combining volatility gating, divergence detection, and multi-factor buy/sell signals on timeframes from 1 minute to 15 minutes. If you want to see confluence applied to live scalping setups with non-repainting signals and a full backtesting dashboard, that is where to start.
Key Takeaways
Confluence in trading works because independent signals from different analytical domains, when aligned at the same price and time, produce a statistically stronger edge than any single indicator can deliver alone.
| Point | Details |
|---|---|
| Independence is everything | Signals from different domains (structure, momentum, volume) create real confluence; correlated indicators do not. |
| Three factors is the sweet spot | Fewer than three independent signals is coincidence; more than four can indicate an exhausted level. |
| Build confluence before entry | Assembling confluence after deciding to trade is hindsight bias, not analysis, and leads to poor discipline. |
| Weight signals by timeframe | Higher-timeframe factors outrank lower-timeframe triggers; structure and location anchor the setup. |
| Stop beyond the zone | Place stops outside the confluence zone so price has room to work and your exit point is clearly defined. |