

Yes, breaker blocks work for scalping, but only under one condition: you trade the retest, never the initial break. The formation runs on a repeatable sequence — liquidity sweep, structure shift, then return to the zone — validated by ICT methodology and used across Scalping-Algo indicator setups. Mark your zones on H1 or H4, confirm entries on M1 to M15, and keep size small until the pattern proves itself on your pairs.
TL;DR:
- Breaker blocks are valid only when a liquidity sweep is followed by a confirmed market structure change, not just the initial reversal.
- Identifying a real breaker block requires a clear price sweep beyond swing highs or lows, a structure break, and a retest of the zone on higher timeframes like H1 or H4.
- Entry should be based on a confirmation candle or rejection pattern during retest, with stops placed beyond the sweep wick and targets at least one reward-to-risk ratio away.
- Avoid trading breakouts on the initial sweep; wait for the retest and structure confirmation to reduce false signals.
- Use lower timeframes like M1 to M15 for precise entries, but confirm zones on higher timeframes to avoid micro-structure noise.
Table of Contents
- What Is a Breaker Block, and How Does It Actually Form?
- How Do You Identify a Valid Breaker Block on the Chart?
- How Do You Scalp a Breaker Block Retest?
- Two Worked Examples: Long and Short Setups
- Order Blocks vs. Mitigation Blocks vs. Breaker Blocks
- Common Mistakes and Risk Management for Breaker Scalping
- Automating Breaker Detection Without Losing the Edge
- A Scalper's Honest Read on Breaker Blocks
- Trade Breaker Retests With Real-Time Confirmation
- Sources
- FAQ
What Is a Breaker Block, and How Does It Actually Form?
A breaker block is a failed order block. Price sweeps a high or low, traps the traders positioned there, then reverses hard enough to break market structure. That old order block flips roles: what was resistance becomes support, or what was support becomes resistance. The ICT breaker block definition is specific about this. It requires a liquidity sweep and a confirmed change of character, not just a sharp reversal.
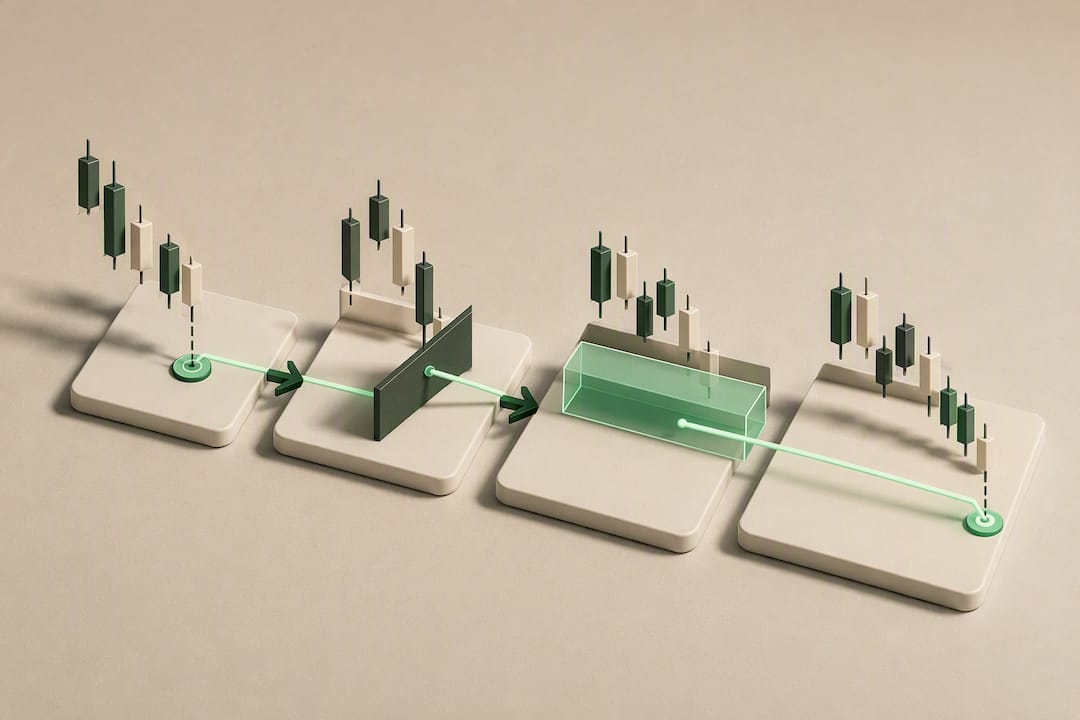
The formation sequence matters more than the name. Here's the order it happens in, every time it's valid:
- Order block forms. A cluster of candles marks the last opposing move before a strong directional push, the footprint of institutional buying or selling.
- Displacement or sweep occurs. Price pushes through a prior high or low, grabbing resting stop orders and liquidity above or below that level.
- Change of character (CHoCH) confirms. Market structure breaks against the sweep direction. A lower high gets taken out, or a higher low forms where one shouldn't.
- Retest follows. Price returns to the origin zone, now flipped, and either holds or fails.
Why does the zone hold at all? Because the sweep didn't just grab liquidity, it also left behind unfilled institutional orders. When price returns, those orders get defended, and retail traders who got trapped on the wrong side of the sweep are forced to exit, adding fuel to the move. A 3Commas breaker block guide makes the same point: the sweep alone proves nothing. You need the structure break too. Skip that step and you're just trading a random reversal candle with a fancy name attached to it.
This distinction is the whole game for scalpers. A sweep without a CHoCH is noise. A sweep with a confirmed CHoCH is a breaker block, and that's the only version worth risking capital on.
How Do You Identify a Valid Breaker Block on the Chart?
Spotting a real breaker takes a few seconds once you've drilled the sequence. Spotting a fake one, unfortunately, takes longer, because fakes look almost identical until the retest fails.
Start with the candle selection. The order block is the last down candle before an aggressive up move (for a bullish breaker) or the last up candle before an aggressive down move (for a bearish breaker). Mark the full range of that candle, wick to wick, not just the body. That's your zone.
- Confirm the sweep. Price must clear a prior swing high or low by a visible margin, not just wick through it by a tick. A clean sweep shows intent; a marginal poke through often just means normal volatility.
- Wait for the CHoCH. After the sweep, watch for the next opposing swing point to break. If price swept a low, you need a lower high to break upward before you can call it a breaker.
- Draw the zone from the original order block candle. Extend it forward until price returns to test it.
- Assign timeframe roles. Mark the zone itself on H1 or H4, where the structure is cleaner and less noisy. Confirm the actual entry on M1 through M15, where scalpers live.
- Avoid spike CHoCHs. A single wick that barely tags a structure point and immediately reverses is not a confirmed break. Wait for a candle close beyond that level.
Timeframe separation is what keeps scalpers out of trouble here. The Profectus guide to automating breaker blocks notes that breakers are typically identified on H4/H1 and then executed on lower timeframes, which matches how most working scalping systems are actually built. Trying to both find and trade the zone on a single one-minute chart usually produces false signals, because micro-structure on M1 breaks constantly without meaning anything on a higher level.
Pro Tip: Keep a simple checklist pinned in your trading workspace: sweep confirmed, CHoCH confirmed, zone marked on H1/H4, waiting for retest on M5. If any box is unchecked, you're not looking at a breaker yet, you're looking at a maybe.
For a deeper breakdown of how breaker zones differ from raw order blocks on the chart, the Scalping-Algo comparison guide walks through side-by-side examples.
How Do You Scalp a Breaker Block Retest?
Identification gets you to the zone. Execution is where most scalpers either protect their edge or hand it back to the market.
Entry method depends on how the retest is shaping up. A limit order placed inside the zone captures the best price and avoids missing a fast reaction, but it also means you're committed before price actually confirms the level is holding. A confirmation-candle entry, waiting for a rejection wick or a small bullish or bearish engulfing candle inside the zone, costs you a few pips of entry price but filters out weak retests that blow straight through. For beginners running breaker-block scalping on volatile pairs, the confirmation entry is the safer starting point.
Lower-timeframe confirmation signals worth watching on the retest:
- A rejection candle with a long wick into the zone and a strong close back out.
- A micro-CHoCH on M1 or M5, a small structure break inside the larger zone that mirrors the higher-timeframe pattern.
- A fair value gap forming just outside the zone as price accelerates away from it.
- Momentum divergence on RSI, where price makes a new extreme into the zone but momentum doesn't confirm it.
The IFXSUCCESS forex scalping method documents exactly this approach: M5 or M15 entries referencing daily or four-hour structure for bias, with RSI and volatility filters layered on for trade management. That combination, higher-timeframe context plus lower-timeframe trigger plus a momentum filter, is a reasonable template if you're building your own system from scratch.
Stops and targets. Place the stop beyond the far edge of the zone, past the wick that created the sweep, not just past the body. Scalping stops that sit too close to the zone get clipped by normal wick noise. For targets, a reward-to-risk band greater than one is realistic for breaker-block scalps, since the point of scalping is frequency and consistency, not chasing outsized single-trade wins.
Session and pair selection. Stick to major forex pairs during London and New York session overlap, where liquidity is deepest and sweeps are more likely to represent genuine institutional activity rather than thin-market noise. Illiquid pairs and dead session hours produce sweeps that mean nothing.
Sizing. Reduce position size on any breaker that runs counter to the higher-timeframe trend. A higher-timeframe bias filter measurably improves breaker trade outcomes, so treat counter-trend setups as lower-conviction and size them down accordingly. Use a fixed percentage risk per trade and a hard daily loss cap, both non-negotiable regardless of how good the setup looks.
Pro Tip: If a breaker forms against the higher-timeframe trend, treat it as a scalp only, not a swing. Take the quick reaction and get out. Don't try to hold a counter-trend breaker for a bigger move.
Two Worked Examples: Long and Short Setups
Bullish example. Price on EUR/USD sells off into a prior daily low, sweeping the level by six pips and tagging a cluster of resting sell-stops. That sweep candle closes back above the swept low, an early tell. Over the next few H1 candles, price breaks the most recent lower high, confirming the CHoCH. The order block, the last down candle before the reversal push, gets marked and extended forward. Two hours later, price pulls back into that zone on the M5 chart.
- Watch the M5 retest into the marked zone.
- Wait for a rejection candle, a hammer or bullish engulfing pattern, closing back above the zone's lower boundary.
- Enter on the close of that confirmation candle, or place a limit order at the zone's midpoint if you prefer to front-run the reaction.
- Set the stop a few pips beyond the sweep wick, below the zone's low.
- Target 1.5 to 2 times the risk, or the next intraday liquidity pool.
Bearish example. Same sequence, reversed. Gold sweeps an H4 high, trapping late longs. Structure breaks downward on the next swing point, confirming the CHoCH. The order block, this time the last up candle before the drop, gets marked. Price retests that zone on M1, prints a bearish micro-CHoCH, and rejects with a strong down candle.
Enter short on the confirmation candle's close, stop above the sweep high, target the prior swing low or a 1:2 reward-to-risk exit. On fast-moving instruments like gold or high-beta crypto pairs, favor market entries over limit orders once confirmation prints. Slippage is a real cost during volatile retests, and a limit order that never fills is a trade you didn't take, not a trade you saved money on. Adjust your stop distance to current volatility rather than using a fixed pip value across every session.
Order Blocks vs. Mitigation Blocks vs. Breaker Blocks
These three zones get confused constantly, and the confusion costs scalpers real money.
An order block is the original zone: the last opposing candle before a strong directional move, marking where big players likely entered. It hasn't been invalidated yet. A breaker block is what happens after that order block fails, gets swept, and flips role following a confirmed structure break. The role has reversed entirely.
A mitigation block is different from both. It forms when price returns to an origin zone to fill unfinished orders, but without a liquidity sweep preceding it. The Audacity Capital breakdown of trading blocks draws this line clearly: mitigation is about revisiting unfilled orders, while a breaker specifically requires the sweep-plus-structure-break combination.
Practical decision rules for scalpers:
- No sweep, no structure break? Treat it as a standard order block, not a breaker.
- Sweep present, but no confirmed structure break? Wait. It might become a breaker, but it isn't one yet.
- Sweep confirmed, structure break confirmed? Tradeable as a breaker on the retest.
Mislabeling a mitigation block as a breaker is one of the fastest ways to misprice risk on a scalp.
Common Mistakes and Risk Management for Breaker Scalping
The biggest error, by a wide margin, is entering on the initial break instead of waiting for the retest. That's not a breaker trade, it's a breakout trade wearing a breaker's name, and it carries a much worse risk profile.
Other recurring mistakes:
- Calling a breaker on the sweep alone, before any structure break confirms it. This is the most common labeling error among newer traders.
- Ignoring higher-timeframe bias and trading every retest with equal size regardless of trend direction.
- Overleveraging on lower timeframes, where spread and slippage eat into the tighter stops scalpers rely on.
- Skipping the confirmation candle entirely because the setup "looks obvious."
Risk controls worth building into every session: cap risk at a fixed percentage per trade, set a hard daily drawdown limit that shuts down trading for the day once hit, and adjust stop distance based on current volatility rather than a static pip count. The Scalping-Algo risk management guide covers position-sizing frameworks that pair well with breaker setups specifically.
Before trading breakers live, backtest a minimum sample of 30 to 50 setups, log realistic slippage assumptions rather than perfect fills, and track win rate against reward-to-risk separately so you know which variable is actually driving your edge.
Pro Tip: Log every breaker trade you take for at least a month, win or lose. Most scalpers discover their real edge sits on one or two specific pairs and sessions, not everywhere they thought it did.
Automating Breaker Detection Without Losing the Edge
Some steps in this sequence mechanize cleanly. Others don't, and pretending otherwise costs money.
Sweep detection, zone marking, and structure-break flagging are all rules-based enough to automate reliably. Fair value gap detection also mechanizes well. Micro-price context on the retest itself, the subtle read on whether a rejection candle carries real conviction, still benefits from a discretionary glance rather than a pure algorithm, a point the Profectus automation guide makes directly.
What to mechanize:
- Detect the order block and record its boundaries automatically.
- Flag a confirmed close beyond a prior swing high or low as a sweep.
- Alert on CHoCH confirmation once structure actually breaks.
- Watch for price returning into the recorded zone and surface a retest alert.
Scalping-Algo's order block indicator suite handles this detection chain on TradingView, paired with volatility gating and webhook alerts that push retest notifications directly to Discord, cutting the lag between zone touch and trade decision.
A Scalper's Honest Read on Breaker Blocks
Breaker-block scalping fits traders who already read price action fluently and have the patience to wait for the retest instead of chasing the break. It works best on accounts that can absorb several small losses while the pattern proves out on their specific pairs, not accounts trading their only shot at rent money. Demo it first, log every trade, and expect slippage to erase some of your backtested edge.
— Tran
Trade Breaker Retests With Real-Time Confirmation
Manually tracking sweeps, structure breaks, and retests across multiple pairs is where most scalpers lose the thread, not because the rules are hard, but because watching five charts for a six-second confirmation window is exhausting. Scalping-Algo's indicator suite detects the sweep, flags the structure break, and pushes a retest alert straight to your phone or Discord before you'd have spotted it manually.

The 3-indicator Algo Master system pairs order-block and breaker detection with volatility gating, so you're not getting alerted on every sweep, only the ones with confirmed structure behind them. Paper-test the signals against your own breaker checklist for a week before committing real size, then scale in once the confirmation logic matches how you'd have traded it by hand.
Sources
For the original ICT framework, see the breaker block methodology. For timeframe selection specific to scalping, the Scalping-Algo timeframe guide and volatility guide cover the mechanics in more depth.
- Breaker Blocks: A smart money trading guide from experts | 3Commas
- ICT Breaker Blocks: How to Trade & Automate Breaker Blocks | Profectus
- Blocks in Trading: Explained (2026 Guide) | Audacity Capital
- Forex Scalping Success Techniques Using the Breaker Blocks IFX Method - IFXSUCCESS
FAQ
What Does a Breaker Block Mean in Trading?
A breaker block is a failed order block that reverses role after a liquidity sweep and a confirmed change of market structure. Once the flip happens, the zone that used to act as resistance becomes support, or vice versa, and traders re-enter on the retest.
What Is the Most Profitable Scalping Strategy?
No single strategy guarantees profit, but breaker-block scalping with strict retest entries, lower-timeframe confirmation, and a higher-timeframe bias filter is a coherent, testable approach. Tools like the Scalping-Algo indicator suite help standardize that process across sessions.
Is One-Minute Scalping Profitable?
One-minute scalping can be profitable for traders with fast execution, tight spreads, and disciplined risk controls, but it also amplifies the cost of slippage and noise. Most breaker-block scalpers use M1 to M5 for entry confirmation while marking zones on H1 or H4, rather than trading the pattern purely on M1.
What Is the 3-5-7 Rule in Trading?
Definitions vary across trading communities, and no single standardized version applies universally to breaker-block scalping. Rather than relying on that rule specifically, scalpers trading breakers are better served by the sweep-then-structure-break-then-retest sequence outlined here.
How Do Breaker Blocks Differ From Order Blocks?
An order block is the original zone marking institutional entry before a strong move, still unbroken. A breaker block is what remains after that same zone gets swept and flips direction following a confirmed structure break, a distinction covered in more detail in the order blocks versus breaker blocks comparison.